Your PBX is a vital part of how you complete your day to day business. Imagine what would happen if it stopped working: customers wouldn’t be able to call to place orders or to get support for your product, people working from home would no longer be able to make business calls or take advantage of direct extension dialing. Fortunately, there is a way that you can have peace of mind when it comes to your PBX.
Having an automatically scheduled backup is one of the best ways to ensure minimal downtime in the event your PBX ceases to function normally. In this article we will walk through the process of configuring your FreePBX 15 server to backup automatically utilizing one of our FTP backup plans. If you are looking for information on how to manually create a complete backup of your FreePBX 15 server for download have a look at our article [HOW TO] Create a Complete FreePBX 15 backup.
Here is an overview of the steps we will be taking:
- Setting up an FTP user for the PBX
- Creating and configuring a backup job
- Running a test backup
- Verifying the test backup
Setting up an FTP user for your PBX
Log in to your FTP Hosting control panel: files.ftphosting.com On the left side click “Users” then click “Add User” in the upper right corner and click next.
Select standard user

Enter the desired Username for your PBX’s account and the corresponding notification email and click next.

Configure the FTP rights as illustrated below, then click next.

Select the folder for your PBX and check the boxes for “File Rights” and “Directory rights”

Click add user.
When you get to the next screen click “Assign Now” to assign a password to the user you just made. Make note of this password; you will need it later.

Now we will move over to the PBX to complete the rest of this process.
Creating and Configuring a Backup Job
Log into your FreePBX 15 server and go to “Settings” and click “Filestore”

Select the “FTP” tab and click “+Add FTP Instance”

Fill out the following details:
- Hostname: files.ftphosting.com
- Port: 21
- Username: The FTP username you created earlier
- Password: The FTP password you created earlier

Click “Submit” in the lower right corner.
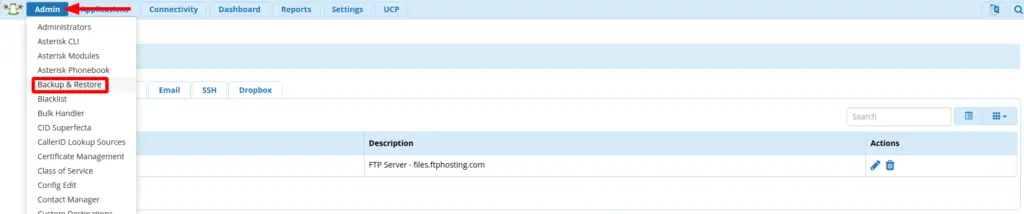
Go to “Admin” and click “Backup & Restore”

Go to the “Backup” tab and click “+Add Backup”

Add the following details to the “Add Backup” page.
Basic information
- Backup name
- Backup Description
- Backup Items: Click the “Modules” button to choose the modules you want to be backed up. Most likely you will want to select all modules. If you have call recordings enabled, you’ll most likely want to expand the “Call Recording Reports” module and unselect “Call Recordings” as call recordings can quickly use up all available space.
- Custom Files: Files or folders not included in the modules menu, but you still want to be backed up
Notifications
- Notifications Email: The email notifications will be sent to
- Inline logs: Optional
- Email type: Under what conditions you receive an email notification
Storage
- (We will cover this next)
Schedule and Maintenance
- Enabled: Toggle “Yes”
- Scheduling: Set the time and frequency you would like the backup to run
- Delete after runs: Delete backup after a certain number of backups have occurred.
- Delete after days: Delete backup after it has reached a certain age in days
- Hooks: Optional
- Warm Spare: Skip
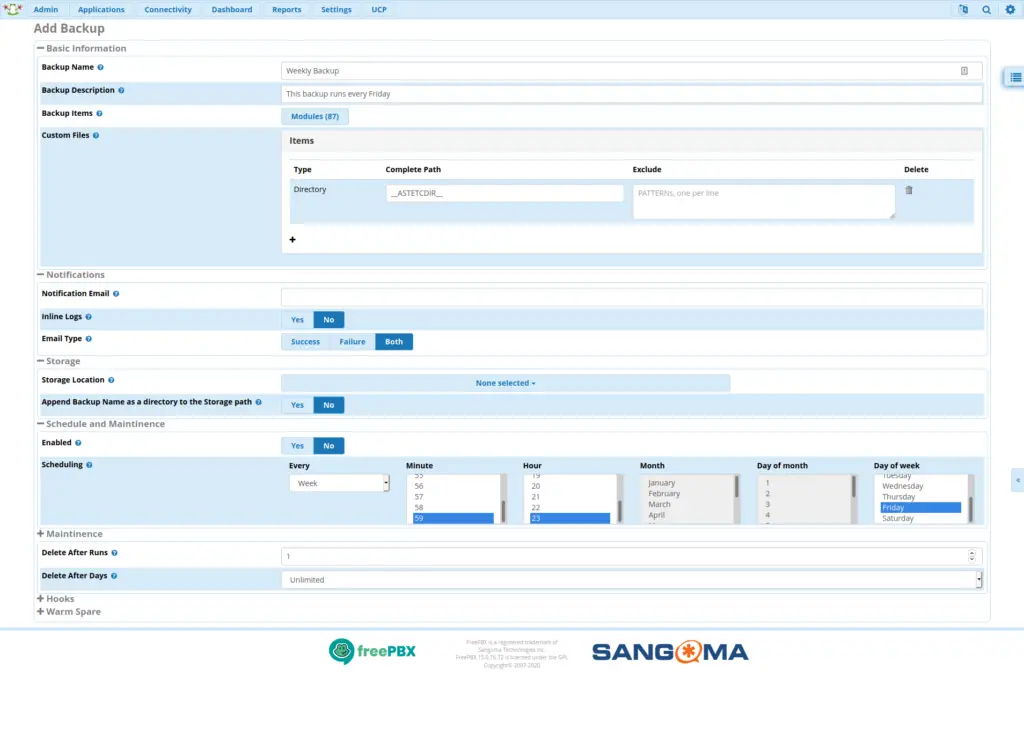
Under the “Storage” subheader click “None Selected” and choose your FTP filestore.

Click “Save” in the lower right corner.
Running a Test Backup
Go to “Admin” and click “Backup & Restore”

Click the “Play” icon under the “Actions” heading to run a test backup.

You will be presented with the following screen.

When the backup is complete you will briefly see a blue banner along the top. If you miss this, look for the words “Finished Saving to Selected Filestore locations” in the log.

Verifying the Test Backup
Please note the following: This step is for servers that are brand new or are not critical production servers. Restoring a backup on a production server may require additional steps for the server to be ready to use, and restoring an improperly configured backup could break the server. Proceed with caution.
Go to “Admin” and click “Backup & Restore”
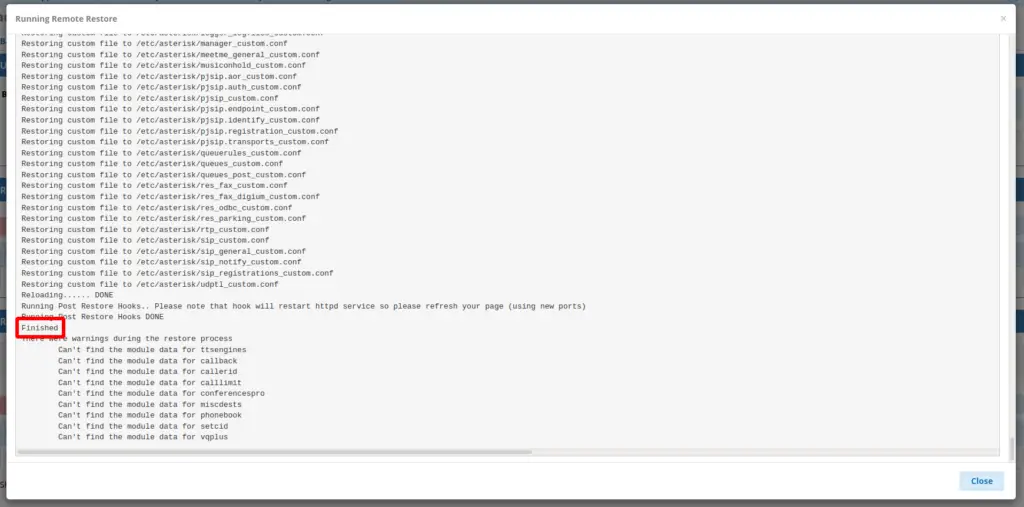
Go to the “Restore” tab and click the “Play” icon under the “Actions” heading under the “Restore from the Cloud” section and click “Yes” on the confirmation dialogue.

Like the backup, you will be presented with a scrolling log of the in-progress restore. When it is completed, you will be briefly presented with a blue success banner as before. If you miss this look for the word “Finished” near the end of the log file.
Conclusion
Now that your backup job has been configured and verified you are all finished and can rest easy knowing that your PBX can be restored quickly in the event of a failure.