The first thing you should do after completing the FreePBX Setup Wizard is to finish configuring the firewall. To access the firewall choose Connectivity, Firewall:

The first thing that we will do is to enable the “Responsive” features. The responsive feature dynamically adds an IP address to the firewall once a phone has successfully connected from the IP. The IP will be automatically removed if/when the phone disconnects.
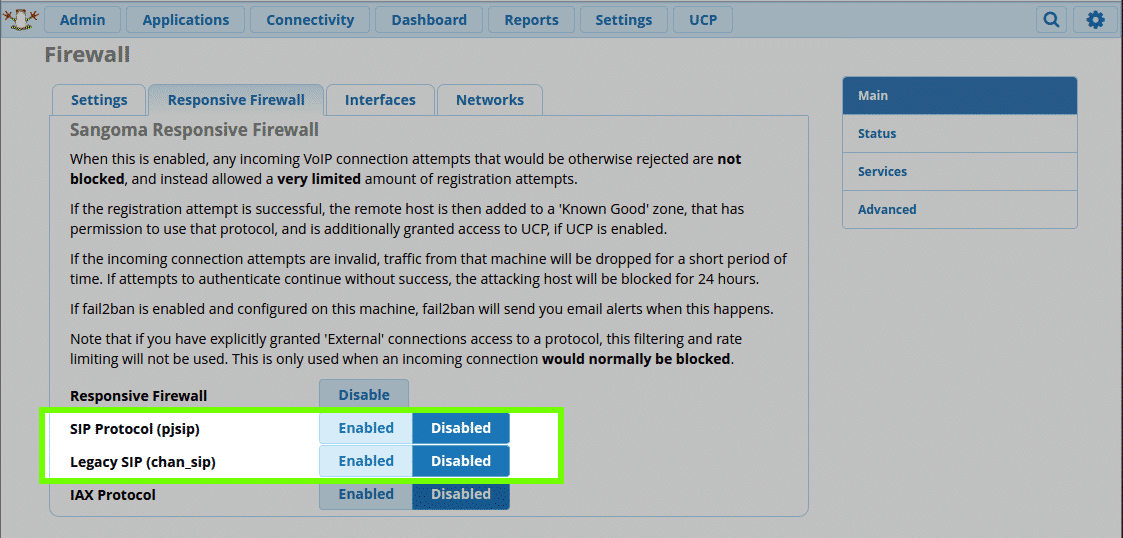
Click on the “Responsive Firewall” tab:

There are two ways for phones to connect to the PBX:
- chan_sip – This is the method that is enabled in FreePBX by default.
- pjsip – This is a newer method. It is only enabled if you switch to version 13 of Asterisk.
We highly suggest that you enable both pjsip and chan_sip by clicking on the Enabled button (they will then turn dark blue). This future proofs the setup regardless of which method you choose.
The next thing that needs to be done is to grant access to IPs/networks from which you need to be able to access your PBX. You don’t need to grant access to networks that will have phones registered if you’ve already enabled Responsive Firewall, but you may wish to grant access to networks from which you will administer the PBX but not necessarily have extensions, or don’t have them set up yet.
Adding the FreePBXHosting.com NOC range is optional, but if it is not done our support staff will be unable to access your PBX.
Click on the “Networks” tab:

In the green section at the bottom do the following:
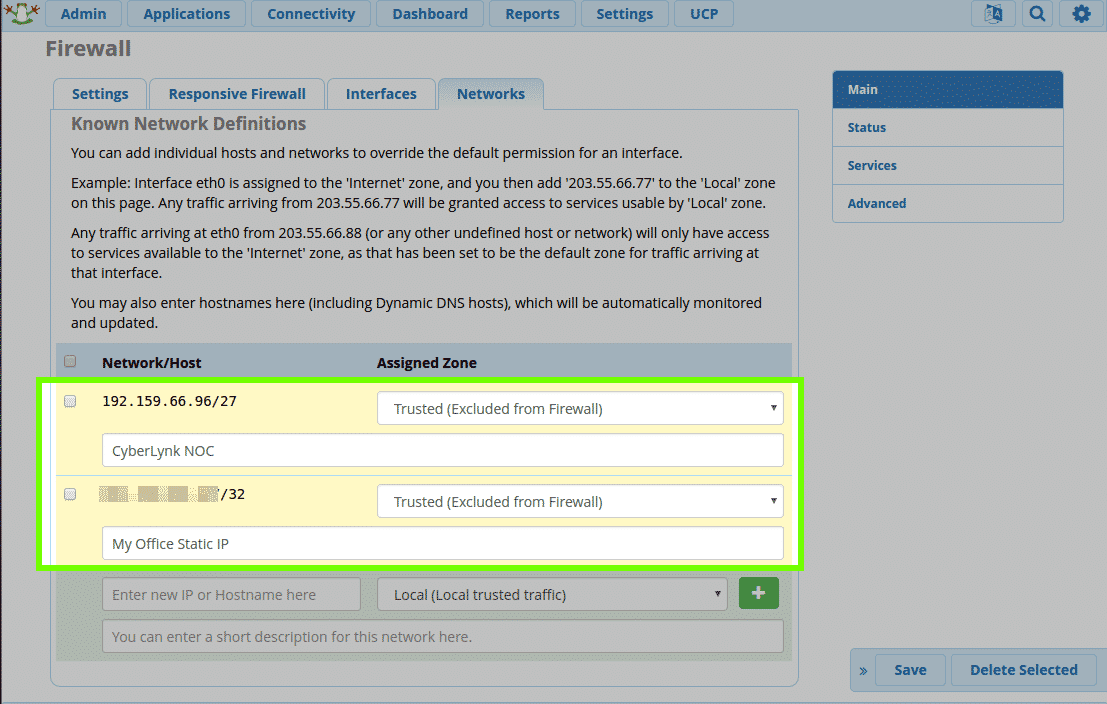
- Enter the IP range: 192.159.66.96/27
- Click the green “+” to add the range
Repeat the process to add your own network(s) if needed. Your networks tab should now look like this:

The last step is to click on the “Interfaces” tab to change the zone for your PBX’s network interface:

We need to change “eth0” from the “Trusted” zone to the “Internet” zone by selecting it from the dropdown under “Default Zone”. Click “Update Interfaces” at the bottom right to confirm the change.
Important: to apply your changes to a running system right away, either disable/re-enable the firewall or restart FreePBX.
Your firewall is now set up and configured and you can begin to configure your PBX!


